Friday, March 30, 2012

Baked Fish and Chips


So Fridays during Lent are always interesting.  This year, I've made a lot of pizza and spinach pie, as well as Baked Scallops and some baked Scrod.  Both times I made the seafood, I was disappointed.  I bought the seafood at East Side Market both times, and while their seafood is usually really good, both meals just didn't taste right.  My husband requested fish during the week, and I promised him fish on Friday.  I really want to make sure I had time to prepare this meal.


Well, I found a recipe online today (On the Food Network website) for Baked Fish and Chips and I have to admit, it was delicious!  I bought the seafood at Horton's in East Providence.  I drive by the sign all the time on my way to work and today decided I would stop there.  I thought it was a fish shop, but it was actually a dine-in or take-out shop (you could smell the fry-o-later from the street...).  They were nice enough to give me a piece of Scrod (for $6.49 a pound!!  Super cheap!!).   I made sure to rise the fish really well before preparing it.  Here we go!!

The Ingredients
The Chips
  •  3 Medium Russet Potatoes
  • 1/4 cup Extra Virgin Olive Oil (I don't think I used a full 1/4 cup....I just eyeballed it)
  • Kosher Salt
  • Cayenne Pepper (I didn't have any in the pantry, so I just used Paprika instead)
The Fish
  •  Olive Oil Cooking Spray (I just used whatever cooking spray I had in the pantry)
  • 2 3/4 cups Crispy Rice Cereal (I didn't have Rice Krispies - I had Rice Chex...But since you have to crush them up, I figured this would be fine...Also, I didn't measure out an amount.  I just poured it in a bowl)
  • Kosher Salt and Fresh Ground Pepper
  • 3 Large Egg Whites
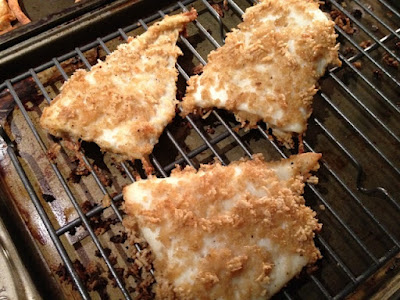
  • 1 1/2 lbs skinless boneless Pollock (I obviously did not use Pollock...I went with Scrod - any firm white fish will do the job) cut into 2x4" pieces (I didn't cut into 2x4 pieces - see picture below)

The Method

Put the racks in the oven on the upper and lower third places and preheat the oven to 450*F.  Place a baking sheet on one of the racks to preheat (this is for the chips - heating the baking sheet initially will help with the crispiness of the chips, and it will also avoid the potatoes sticking to the pan).

The Chips
  • Peel and cut the potatoes into 1/4" thick sticks
  • Toss with olive oil, salt, and pepper (or paprika in my case)
  • Remove the hot baking sheet from the oven, add the potatoes, and spread in an even layer.  
  • Bake on the top rack, turning once, until browned and crisp (about 30 minutes)
 
The Fish
  • Set a wire rack on a baking sheet and coat with cooking spray.
  • Lightly crush the cereal in a bowl with your fingers.  Add 2 tsp salt and pepper to taste.
  • In another bowl, whisk the egg whites with a pinch of salt until frothy.
  • Dip the fish in the egg whites and then roll in the cereal
  • Place the fish on the racks and mist with cooking spray
  • Bake the fish on the bottom rack until crisp and cooked through (I cooked for about 20 minutes - less if the pieces are small)


Serve with tartar sauce, malt vinegar or ketchup :)
Four Servings:  9 Points Plus per serving!


Baked Fish and Chips!  Delicious!!

ENJOY!!

Monday, March 26, 2012

Broccoli Pizza

I remember a long time ago, going with my Nonni and Pop to the Friday night Procession at St. Mary's in Cranston, followed by hanging out at their friends house, Mary and Pete.  That night, Pete's brother, Archie, had made a potato pizza and broccoli pizza.  It always stuck with me how much I loved the broccoli pizza.  And even though it's probably been about 20 years since that night, I've never made the broccoli pizza.  But always thought about it.

It was a very culinary-filled weekend for me, with the visit of my sister's mother in law, and making the lasagna.  On Sunday, my friend Connie came to my mom's house for a Mary Kay party.  She not only led the party, but also helped my sister design a look for her wedding!  I brought spinach pie and broccoli pizza.  The spinach pie will have to be blogged another time.  Today is all about Broccoli Pizza.

Here's what I did:
1) Spread the dough in the pan
       I used a cookie sheet and spread 1 1/2 lbs of dough into a greased pan (NOTE:  It's very important to use Crisco when greasing the pan, as oil will cause the dough to keep springing back.  Crisco will always keep the dough in place).  Another Note - cold dough spreads A LOT easier than room-temperature dough.

2) Cheese
       Normally, when I make pizza, I put the tomato (or broccoli) on first, and then the cheese on top.  For some reason, I decided to try it differently this time:  And it was a HUGE success.  I had a block of Supreme Brand mozzarella cheese in the fridge.  I grated it with a box grater and probably used about half.  Spread it all over the dough.

3) Broccoli Mixture
     I semi-defrosted 2 packages of Blue Bird brand chopped broccoli in the microwave.  While that was whirring, I sauteed about half a medium onion in some olive oil.  Add in the broccoli, salt (not too much because of the cheese, etc), pepper, and 2 cloves of pressed garlic.  Mix it up until the broccoli is warmed through (taste it to make sure it is seasoned well).  Spread all over the dough/cheese.

3) Grated Cheese
       I sprinkled some Peccorino Romano cheese on top of the pizza

4) Bake it, Baby!
       25 -30 minutes at 425* - make sure the bottom is browned, but not burnt!  

Make sure you let the pizza cool a bit before you start cutting it.  Now here's the key:  Because the cheese was on the bottom, it didn't burn when I baked the pizza.  It also served as the glue between the dough and the broccoli.  Normally, the cheese on TOP will keep the broccoli together, but it will all flop off the dough.  NOT this time!

Wahoo!!


MMMMM broccoli pizza!

Sunday, March 25, 2012

Homemade Lasagna

I can't count the number of times I've sat with either my mom, grandmother, or mother in law and watched (and helped) them make lasagna.  HOWEVER - I've never made it myself.  And I think that in all the times that I "helped," I came into the process quite late so I really just helped with the assembly process.

This weekend, my sister's future mother in law was visiting and they were going for the food tasting at the reception hall.  In any case, my mom hosted a dinner Saturday night, not only because of our company, but also because my dad celebrated his 60th birthday on Friday!  She decided on Lasagna and salad, but due to time constraints on her end, I offered to make the lasagna.

Let me tell you.  It was A LOT of work.  I now understand why we only have lasagna on big holidays.  It took about 3 1/2 - 4 hours....

The order in which I made everything:
1) Gravy (sauce, to some of you....)
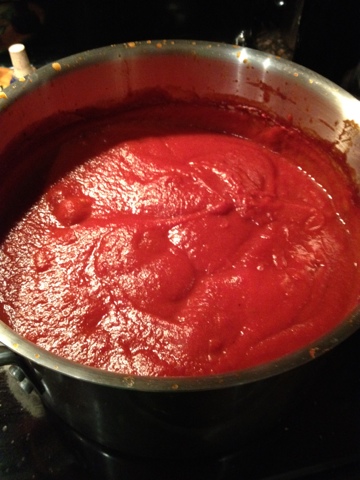
       I used my mother in law's recipe for gravy since it's a bit thicker than my mom's and thought it would stand up better (which it did).  I sauteed onions and hot sausage in oil, added in tomato paste, puree, and water, basil, and a bit of sugar (to cut the acidity of the tomato).  Stir, stir, stir (and taste to make sure it's good). 


2) Meatball mixture.  
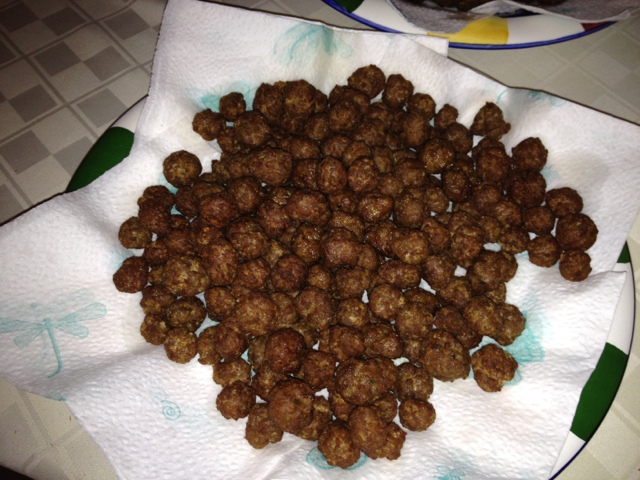
       This took the longest - because after I mixed them up, I had to roll them all!  And YES - I made individual meatballs for the lasagna.  Tiny little itty bitty meatballs.  It took forever.  But the taste is to DIE for.  It really changes the texture and taste of the lasagna.  Ground beef, eggs, salt, pepper, garlic powder, onion powder, and seasoned breadcrumbs.  Then rolled, and fried.


3) Cheeses
       My mom taught me the step of cheeses:  2 lbs of ricotta cheese, grated cheese (I believe I had Peccorino Romano in the fridge), 2 eggs, pepper (you don't really need salt since there's so much in the cheese), and fresh parsley.  All mixed together.  YUM
       I also had a nice block of scamorza cheese - it's very similar to mozzarella cheese but melts better.  I grated this on the box grater.

4)  Assembly
       In a lasagna pan, I layered as follows:
              Gravy
              Noodle (I bought the Barilla noodles that do not require boiling - saves time and space!!)
              Gravy
              Meatballs
              Shredded scamorza cheese
              Gravy
              Noodle 
              Gravy
              Ricotta mixture
              Shredded scamorza cheese
              Gravy
              Noodle 
              Gravy
              Mix of meatballs, Ricotta mixture and scamorza
              Gravy
              Noodle 
              Gravy
              Grated Cheese
                            
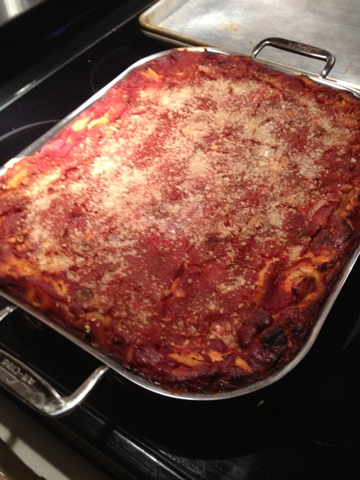
Bake for 1-1 1/2 hours at 350*  Set for at least 1/2 hour before cutting and serving to allow to set!

Deliciousness!

Sunday, March 18, 2012

Homemade bagels!!

My friend Carolyn had posted on Facebook recently about homemade bagels!  I decided it was something I needed to try!

The recipe is SO simple (much easier than other recipes I saw online....)

Here we go (in picture form for the second half!)

The Recipe
1 Tablespoon instant yeast
4 cups unbleached bread flour
2 tsp salt
1 Tablespoon brown sugar
1 1/2 cups luke warm water 


The Method
Mix everything together and knead well.  Sit in a bowl and let rise in a warm place for about an hour.  

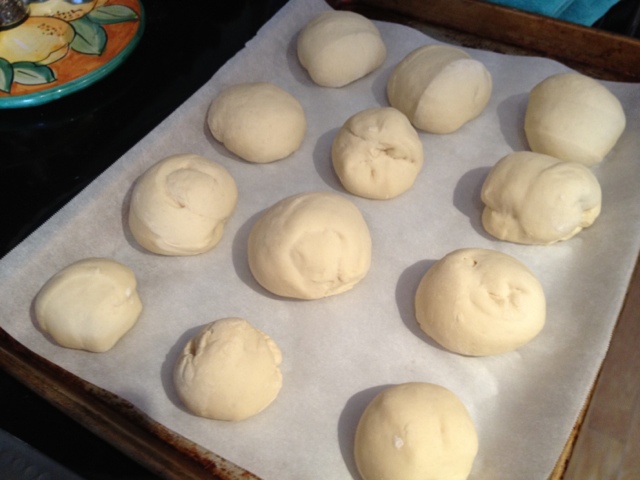
Dough that has been risen for an hour

Divide the dough into balls and smooth them over as best as possible.  Let them rise for another 10 minutes

Dough balls have risen for 10 minutes!

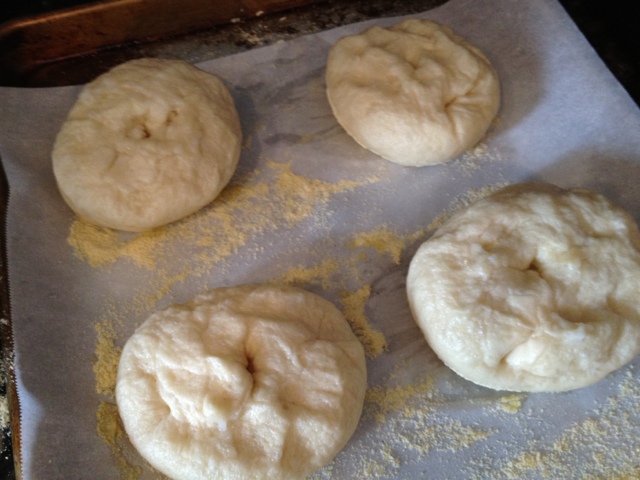
Punch holes in the balls (as you can see, I didn't do a good job of making the balls equal size....)  Let rise for another 30 minutes

Bagels have risen for another 30 minutes and are now ready to be boiled!

Bring a pot of WATER to a light boil and add 1 Tbsp white sugar and 2 Tbsp Brown Sugar (this helps with the browning process when baked)  Boil for 1 minute on EACH side and then remove to a baking sheet lined with foil/parchment paper and corn meal


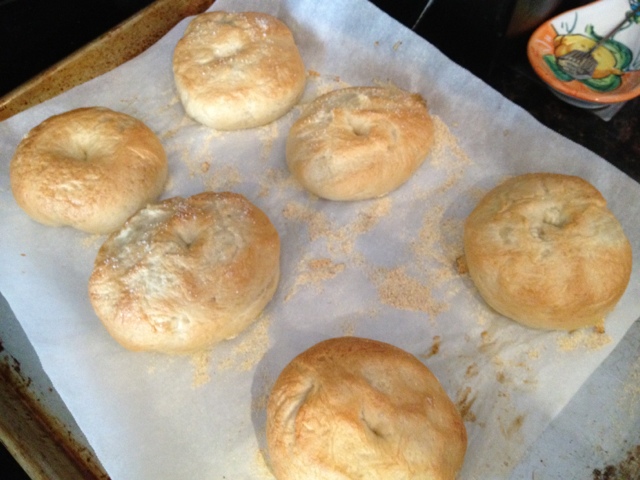
The boiled bagels are ready to be baked!  The parchment paper/foil helps prevent sticking and the corn meal with also help with bottom crunchiness

Bake the bagels for 22 minutes at 425*


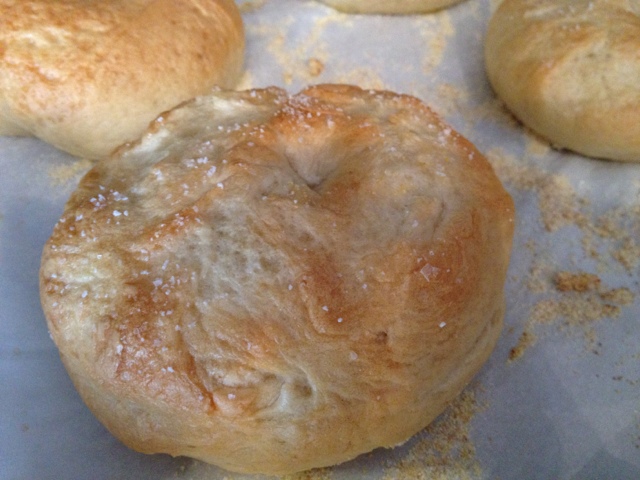
Before baking - while the bagels are still wet, you can add any kind of topping you want.  I added granulated salt...

ENJOY!! - 12 bagels = 4 points plus each!

Thursday, March 15, 2012

The truth!

"People who want to be in your life make the effort and the people who don't really care, don't"


Saw this on my cousin's Facebook wall today.  She's 100% right....Thanks, Amy!

Saturday, March 10, 2012

Baked Scallops

For the past two Fridays, I have made Pizza and Spinach Pie for dinner.  My husband has willingly eaten it without complaint.  However, I know that while it fills you up, within a couple hours, you're hungry again.  Mostly because it's just bread.  Where's the protein??


Being that it's Lent, I figured I would try something else this week for dinner.  Plus, I feel bad - my husband bought himself a turkey sandwich for lunch, and then threw it out after I made a comment about the meat.  He deserves a good meal tonight.


A lady at work once gave me this MASSIVE bag of scallops, and through a web search, I found a recipe that I deemed "a keeper."  Only problem - I don't think I kept the recipe!  Typical Camille.


So I did some searching today and found a recipe that's relatively similar!


Here goes!!


The Recipe

  • 2 lbs sea scallops (about 4 cups)
  • 1 cup dry white wine
  • Salt
  • 6 Tbsp unsalted butter, separated
  • 1 medium onion, finely chopped
  • 2 1/2 Tbsp flour
  • 1/2 cup fine bread crumbs
The Method

  • Preheat the oven to 400*F
  • Put the scallops, wine and pinch of salt into a medium saute pan and bring up to a boil.  
  • Reduce to a simmer, cover, and cook for 4-5 minutes.  
  • Remove the scallops to a 1.5(ish) quart casserole pan.  Reserve the cooking liquid.
  • Heat 3 Tbsp butter in the saute pan on medium heat.  Add the onions and cook until translucent
  • Add the flour and the reserved cooking liquid and mix vigorously.
  • When the sauce is thickened, add it to the casserole baking dish.  Stir to incorporate
  • Sprinkle the bread crumbs over the scallops and dot with the remaining 3 Tbsp of butter.
  • Bake at 400*F for about 15 minutes, until bubbly and brown
I didn't take a picture (SORRY!!!) But I can assure you it's good.  My only suggestion:  I bought scallops from East Side Market and they were NOT fresh.  Make sure you buy FRESH SCALLOPS!!!

Thursday, March 8, 2012

Dinner Disaster

Last night I attempted a Weight Watchers recipe that a friend of mine suggested. Lemon chicken with broccoli. Sounds delicious.

The problem with my version: way too much lemon!! The recipe called for the zest and the juice, next time I'll skip the zest. I also need to cook the broccoli a little less.....I hate mushy broccoli...

So next time, we'll go with a little less lemon, and crispier broccoli. Here's a view of the finished product (served with brown rice)

Tuesday, March 6, 2012

Happy Birthday to.....

OREO Cookies!!!


In my opinion, the BEST cookie ever created!


100 years!  Woooo!!!


And just for fun....


Saturday, March 3, 2012

What's new, cupcake?

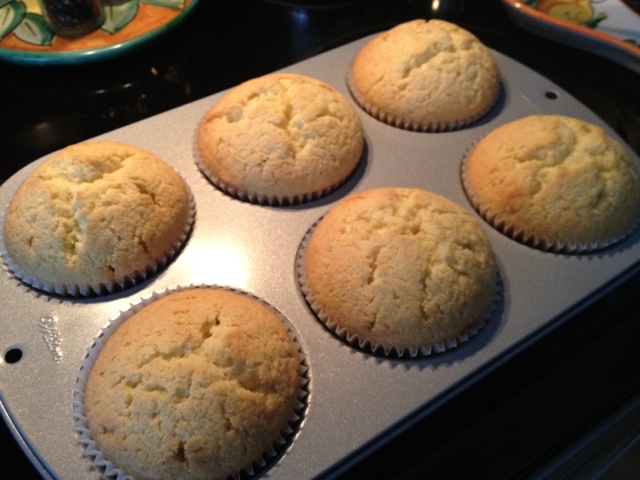
I'm doing a trial run on some "jumbo" cupcakes for someone at work. I got a special size muffin-tin for $9 on amazon, and a package of the papers to go with it (I thought there were 3600 papers in the package, but that was apparently the model number...there are only 48 muffin papers in the pack. Oops!


In any case, my first attempt says to put less batter in each cake so the top doesn't rise so high - it will be easier or decorating later!!